An English version will follow below
1: Fixera teakbänken på avsedd plats och i rätt läge.
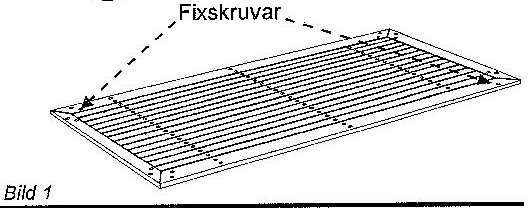
2: Fäst teakbänken med två fixskruvar i var sitt hörn. (bild 1)
3: Tag fram borrmaskin och 3½ mm borr. Borra genom samtliga markerade skruvhål ner i plasten.
4: Rita runt alla ytterkanter. Tag bort alla teakplattor och tejpa därefter på linjerna.
5: Slipa ner eventuella ojämnheter i halkskyddsmönstret, sopa noggrant rent och tvätta med aceton.
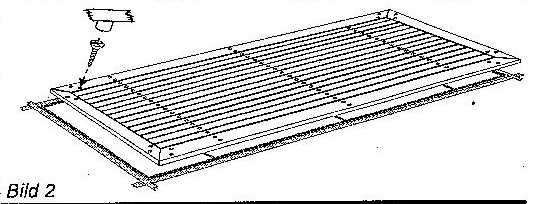
6: Tag silikonsprutan och spritsa en fyllig sträng runt ytterkanterna och över skruvhålen, samt fördela jämnt under teakplattan. (bild 2)
7:Lägg teakbänken på plats och fixera läget genom att först fästa på fixskruvarnas plats (för att motverka förskjutning). Skruva sedan ner samtliga skruvar.
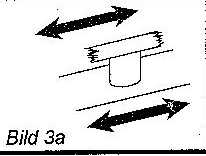
8: Tätningsmassan används som fäste för proppen i botten. Ej runt kanterna. Proppen fästes längs med trät ( bild 3a)
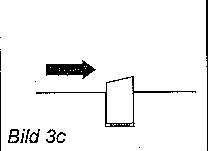
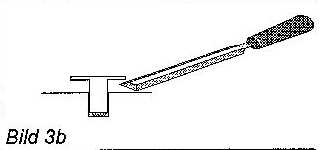
9: Proppen jämnas: Hugg först något över bänkytan, 3-4 mm. (bild 3b). Titta nu på ådringen. Nästa hugg göres från det håll där ådringen är lägst.
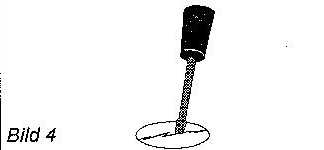
10: Byte av Propp: Proppar som har gått under bänkytan måste bytas. Iakttag då följande (bild 4). Bryt alltid proppen i mitten med en smal skruvmejsel. Om man bryter från kanten kan denna skadas.
English:
Mounting instructions for a teak bench
1. Fix the teak bench on the intended spot and in the right position.
2. Fix the bench with two screws, one in each corner (picture 1).
3. Use a drilling machine and a 3.5 mm drill to drill through all of the marked holes and through the plastic.
4. Draw a line around all outer sides of the bench. Take away all the teak plates and tape alongside the marked lines.
5. Rub off any irregularities in the anti-slip pattern, wipe clean carefully and wash the surface with acetone.
6. Use the silicone squirt to make a full string around the outer sides and across the screw holes. Distribute evenly underneath the teak plate (picture 2).
7. Put the teak bench in place and fix it by fastening the screws (to prevent displacement). Then fasten all screws.
8. The sealing paste should be used to attach the plug to the bottom, not around the sides. Attach the plug alongside the wood (picture 3a).
9. Levelling the plug: Begin by cutting slightly above the surface of the bench, 3-4 mm (picture 3b). Now observe the pattern of the wood. The next cut should be made from the side where the direction of the pattern is on the lowest level.
10. Change of plugs: Plugs that have gone down
below the surface of the bench need to be exchanged. The following should
be observed (picture 4): always split the plug in two by using a slim
screwdriver. Splitting the plug from the side may damage the side of the
bench.